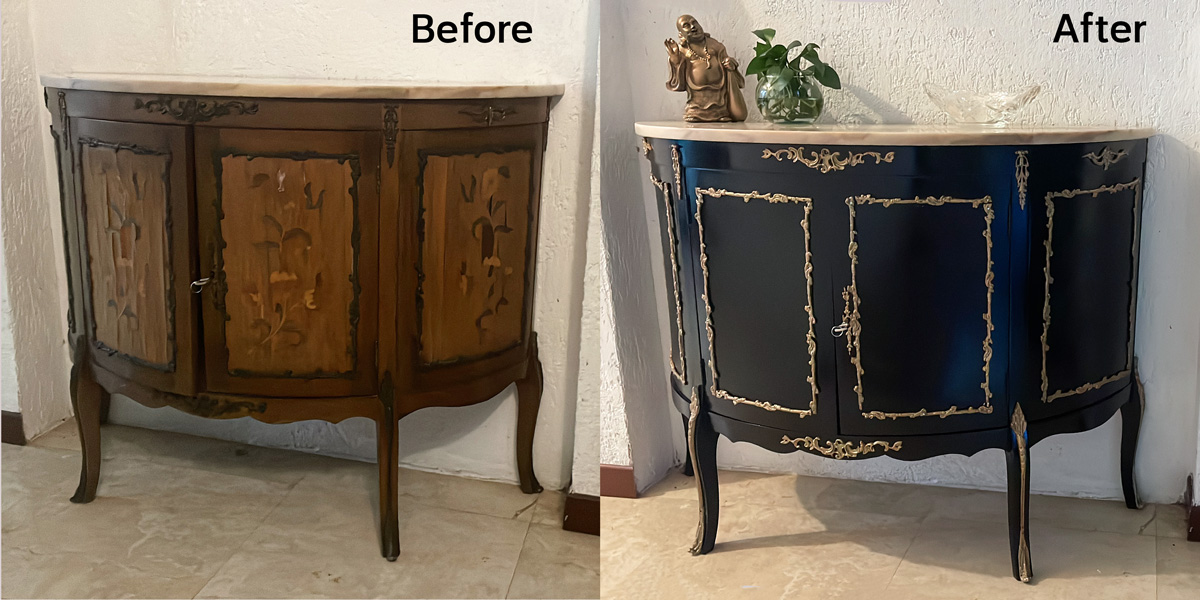
When I moved into my home, one of the first things I noticed was how small and narrow the entryway was. There was hardly enough space for a decorative piece, but I knew something was missing. DIY French-style chiffonier renovation turned out to be the perfect solution to breathe life into the space, and in this post, I’ll walk you through how I found, restored, and transformed it.
The Space and the Vision
My entryway is relatively narrow, with just enough room to fit a piece of furniture against the right wall. The wall has a small recess, about 15 centimeters deep and 115 centimeters long. I’m pretty sure the architects intended this space for a mirror or maybe a small table—something functional where you could fix your appearance before heading out the door.
For years, I had an artisanal cabinet in this space, full of porcelain pieces that didn’t belong to me. Honestly, I hated it. It didn’t fit the space, and it wasn’t my style. Eventually, I packed up the porcelain (partly to protect it from my then-toddler who was starting to walk) and said goodbye to the cabinet. For a while, the space was completely empty.
Then, one day, the lamp hanging there broke. It had a damaged converter, so I took it down, salvaged the crystal beads, and tossed the rest. The area looked barren, and I knew I needed to do something about it. That’s when I started searching for a piece of furniture that could fit perfectly.
The Hunt for the Perfect Piece
I took measurements and decided to start looking for a second-hand piece. My requirements were simple: I didn’t want anything too large that would block the entry (a basic feng shui principle), and I didn’t want to spend more than $100 (that was my budget). I had a few ideas in mind—a narrow console table, a floating shelf, or a small chiffonier. I leaned towards the latter but knew that finding a nice one within my budget might be a challenge.
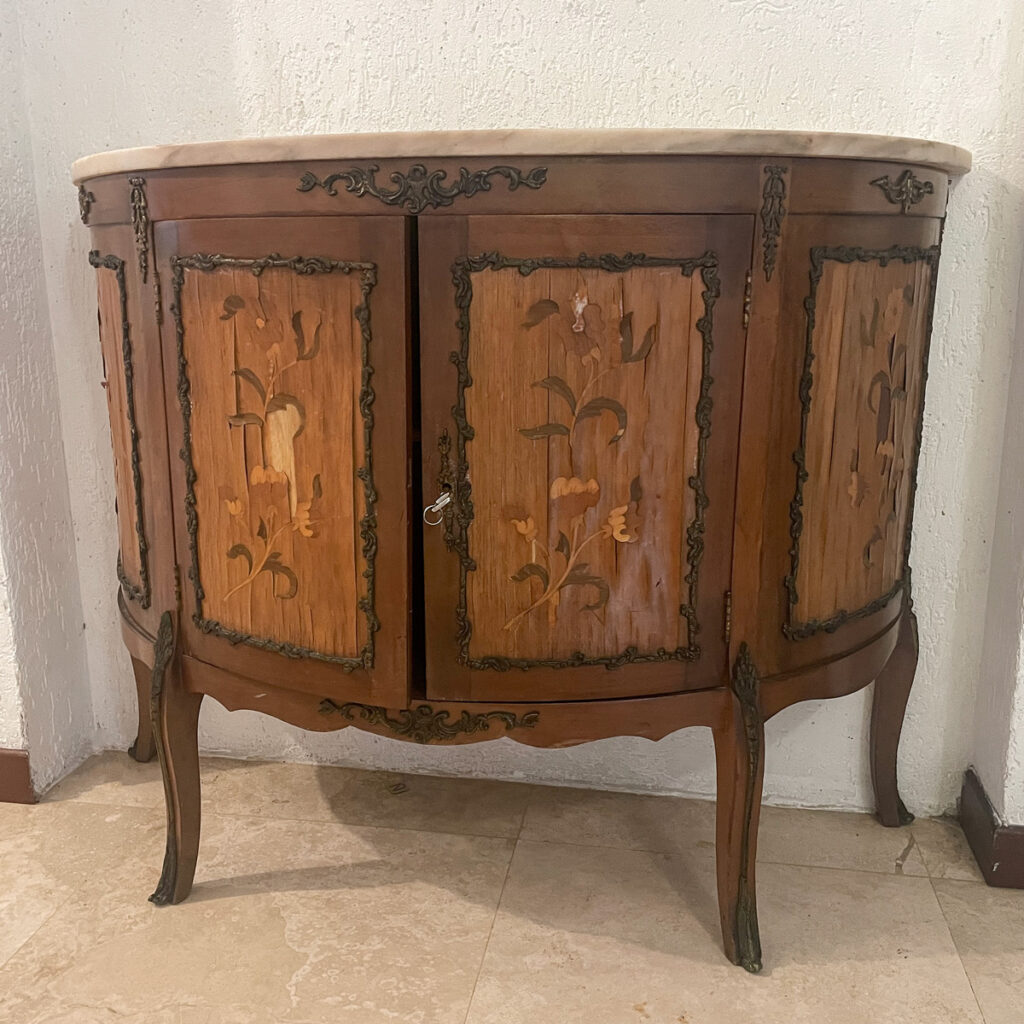
I didn’t stress too much about it, but I made it a habit to browse second-hand markets every week, hoping the right piece would show up. Eventually, it did! I found a small French-style chiffonier made of mahogany veneer, with brass details. It was in bad shape, but it had the perfect measurements. Best of all? It was only $10. Unbelievable, right?
The story behind the chiffonier was bittersweet. It had belonged to an elderly couple who had passed away, and their children were selling the furniture from their apartment. The damaged veneer meant no one wanted the piece, so they had marked it down for a quick sale. When I went to pick it up, I also found a beautiful elliptical mirror with a thick, brown frame for $20. I knew I could make them work together, so I bought the mirror as well.
The DIY French-style Chiffonier Renovation Process
Once I brought the chiffonier home, I placed it in the entryway immediately, even though it looked awful. I hadn’t worked on a piece like this before, but I was excited to start the renovation.
Step 1: Removing the Veneer
The first step was removing the damaged veneer.
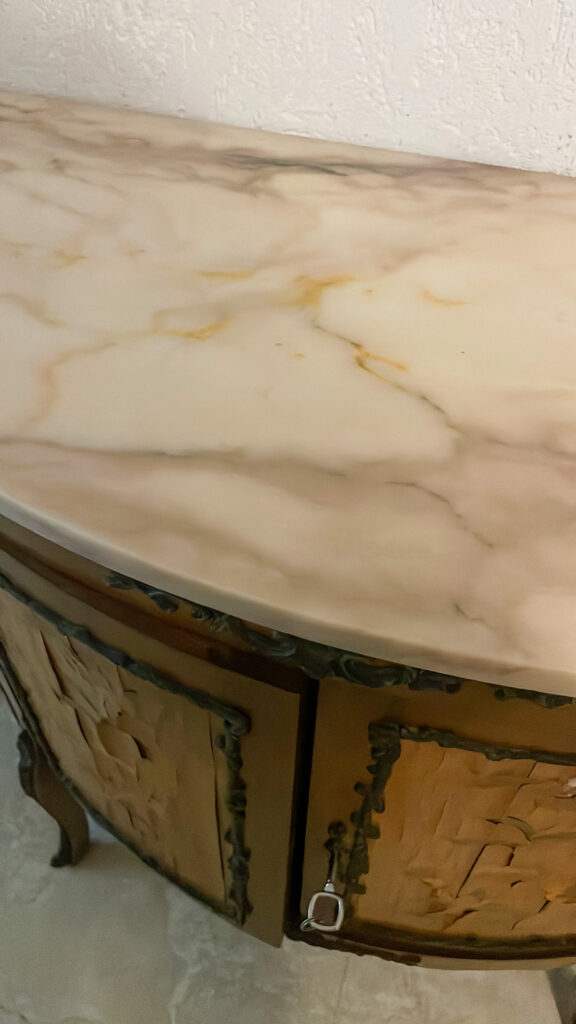
I started by pulling off the parts that were already peeling, then used a spatula for the more stubborn sections. Eventually, I sprayed the remaining veneer with water and used a hot iron with a cloth to loosen the glue. This made it easier to remove every last piece.
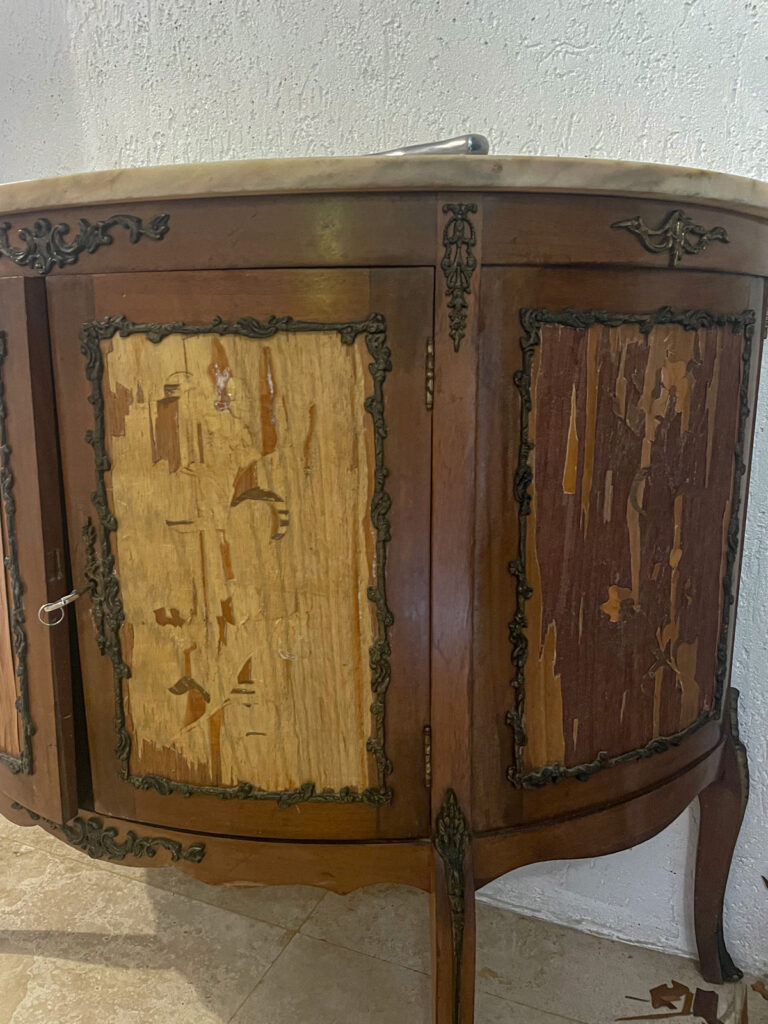
Unfortunately, the base wood was slightly damaged in the process, but I patched it up with wood filler.
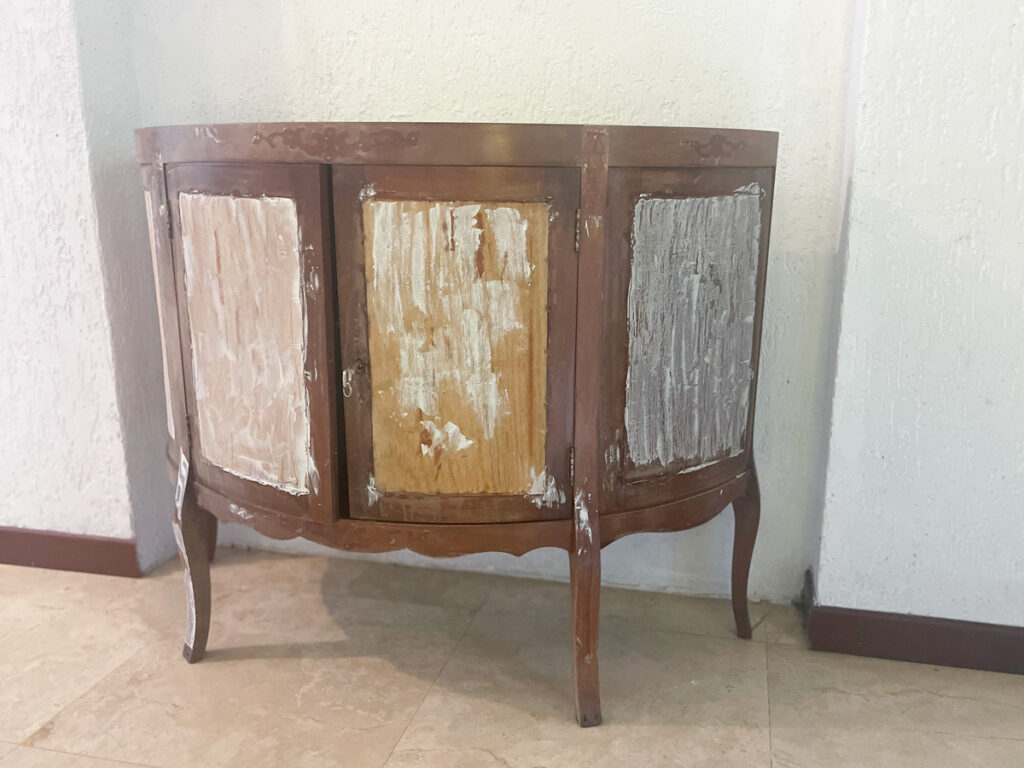
Step 2: Cleaning and Restoring the Brass Details
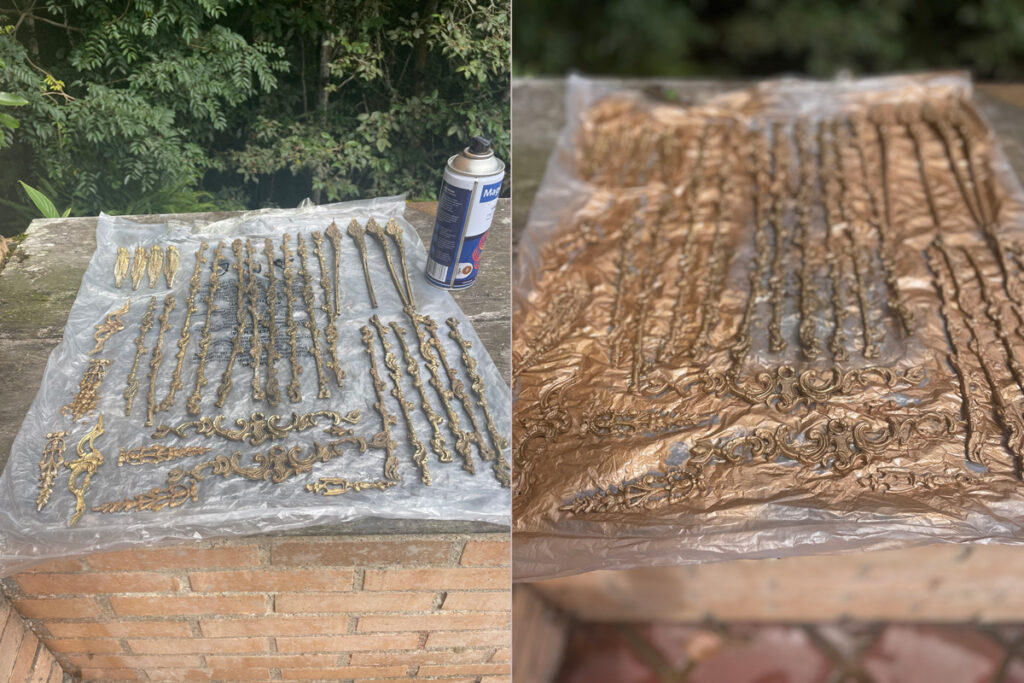
One of the most beautiful features of the chiffonier was the brass appliqués. These were attached to the wood with tiny nails, and I had to carefully pry them off one by one, using a knife to wedge under the appliqué and gently lift it. For anyone who hasn’t worked with furniture like this, be patient—these brass details are delicate and can bend easily.
I even managed to save some of the original nails, which was a nice bonus. Once the brass was off, I gave it a good wash but decided not to polish it too much. I ended up spray-painting it gold, which gave it a modern touch without losing its charm.
Step 3: Painting the Chiffonier
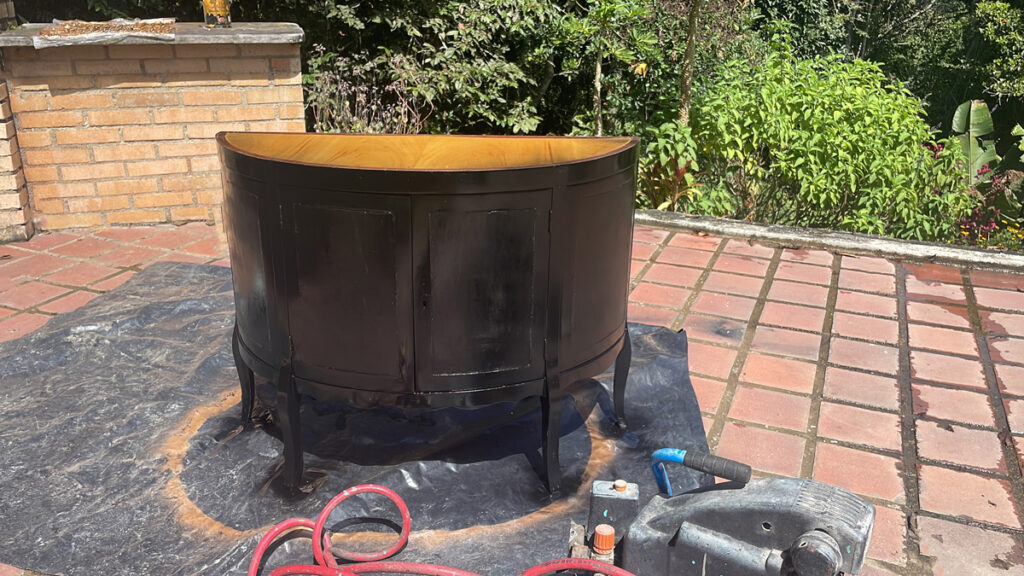
By the time I was ready to paint, two months had passed (I work on these projects in my spare time). I filled any gaps and sanded the surface, then used my compressor to apply two coats of black oil-based paint. The result was stunning—the glossy black finish made the chiffonier look elegant and timeless.
The Final Touches for DIY French-style Chiffonier Renovation: Mirror and Lighting
With the chiffonier finished, it was time to work on the mirror. I spray-painted the frame gold to match the brass details on the chiffonier. Once everything was in place, the entryway looked so much better—but I wasn’t done yet. Remember the lamp I mentioned earlier? I took the chandelier from my dressing room—a beautiful antique bronze piece—and installed it in the entryway.
Now the dressing room only has a simple bulb (which I’ll upgrade soon), but the entryway is stunning. The marble top on the chiffonier still needs a bit more polishing, and I plan to line the inside of the drawers with decorative paper, but for now, I’m using it as-is, and I love how it turned out.



0 Comments